Setup (Mac)
This is the setup guide for Mac. If you’re using a PC, go to those instructions instead!
System Requirements
In general, any Mac made within the last five years will be perfectly fine for this course. The code works natively on both older Intel Macs and the newer M1 Macs.
However, you do need to be running a relatively recent version of macOS (eg. you need one of these: 10.15 “Catalina”, 11 “Big Sur”, 12 “Monterey”, or 13 “Ventura”). If you have a version older than 10.15, you may need to first update your macOS version through the App Store (though it’s possible it could still work with older versions).
You will need at least 6 GB of hard drive space, possibly more if you haven’t previously installed some of the tools we’ll be using.
System Setup and Building LLVM
Before downloading the USCC project and working in Visual Studio Code, you first need to do this setup and build the LLVM compiler library from the terminal.
If you have an M1 Mac and previously setup your Terminal to run in Rosetta (Intel compatibility mode) for another class, make sure for this class you instead use a native instance of Terminal. If you run your Terminal through Rosetta, Homebrew will think you have an Intel processor and won’t install the native M1 tools that you’ll want for this class. You can confirm your Terminal on an M1 is native if you run uname -m and the output says arm64.
-
Open up a Terminal.
- Make sure you have the Xcode command-line tools installed (you need these even though you’ll ultimately develop using Visual Studio Code) by typing:
xcode-select --installYou’ll either get a message that the tools are already installed or, if not, it will install the tools.
-
Next, install Homebrew: https://brew.sh/ (if you already have Homebrew installed, you should do
brew updateto make sure you have the latest formulae) -
If you have an M1 Mac, after installing Homebrew it will tell you that you have to add
/opt/homebrew/binto yourPATHfor it to work properly. Type the exact instructions it specifies. -
Next, you need to install the following packages with homebrew:
brew install cmake ninja zstdNote: If you have previously installed CMake or the other packages, you may need to
brew upgradeto make sure you have the latest versions. - For this class, you are going to work out of an
itp439directory from your home directory. Run the following commands:cd ~ mkdir itp439 cd itp439 - Download the source code for LLVM (we are using the relatively new 15.x branch, but not the bleeding edge 16.x):
curl -L -O https://github.com/llvm/llvm-project/releases/download/llvmorg-15.0.6/llvm-project-15.0.6.src.tar.xz - Extract the archive:
tar xJf llvm-project-15.0.6.src.tar.xz - Rename the extracted directory to just
llvm-project:mv llvm-project-15.0.6.src llvm-project - Enter the
llvm-projectdirectory:cd llvm-project - Inside
llvm-project, make abuilddirectory and change to it:mkdir build cd build - Next, run CMake to configure LLVM with the following command:
cmake -G Ninja -DCMAKE_BUILD_TYPE=Release -DLLVM_ENABLE_ASSERTIONS=ON ../llvm -
To build LLVM in parallel with Ninja, you need to know how many parallel jobs you want. In my case, my M1 Pro has 10 cores (8 performance and 2 efficiency), so I chose
8. If you want more or less, you should change the number after the-jcommand to what you want. If you don’t build in parallel it will take significantly longer to build. -
Once you’ve figured out the number you want, run this command to build:
cmake --build . -j 8 - The build will take 10-20 minutes depending on your system and value of
-j, but you only have to build once the entire semester.
Git and GitHub
Here are the steps to getting setup on GitHub:
-
You need to accept the GitHub classroom assignment: https://classroom.github.com/a/3f2PzNBu
-
Select your USC email from the list. If you do not see your email address listed, that’s okay, just “skip” this step for now.
-
Once you accept the assignment, GitHub will create a repository for you with a URL like this: https://github.com/itp439-20231/uscc-YourUsername. It should automatically redirect you to your repository page once created.
- Return to terminal and your
~/itp439directory:cd ~/itp439 -
Unless you’ve previously setup SSL for GitHub, to use https to clone/push to GitHub, you should setup Git Credential Manager to simplify the authentication process.
-
Clone your repo into a directory called
uscc. The command will look something like this:git clone https://github.com/itp439-20231/uscc-YourUserName.git uscc
Visual Studio Code Setup
Although you can conceivably use another IDE, Visual Studio Code is now the most popular C++ IDE for Mac, so it is recommended for most students. If you really want to use something else, it is possible to do so, but you are on your own if you have problems.
- Download and install Visual Studio Code (steps 1-4 here). If you’ve previously installed Visual Studio Code on your Mac, you should launch it and make sure it’s up-to-date.
- Inside Visual Studio Code, you’ll need to install some extensions for it to work properly with CMake and C++. Go to View>Extensions and search for and install all of the following:
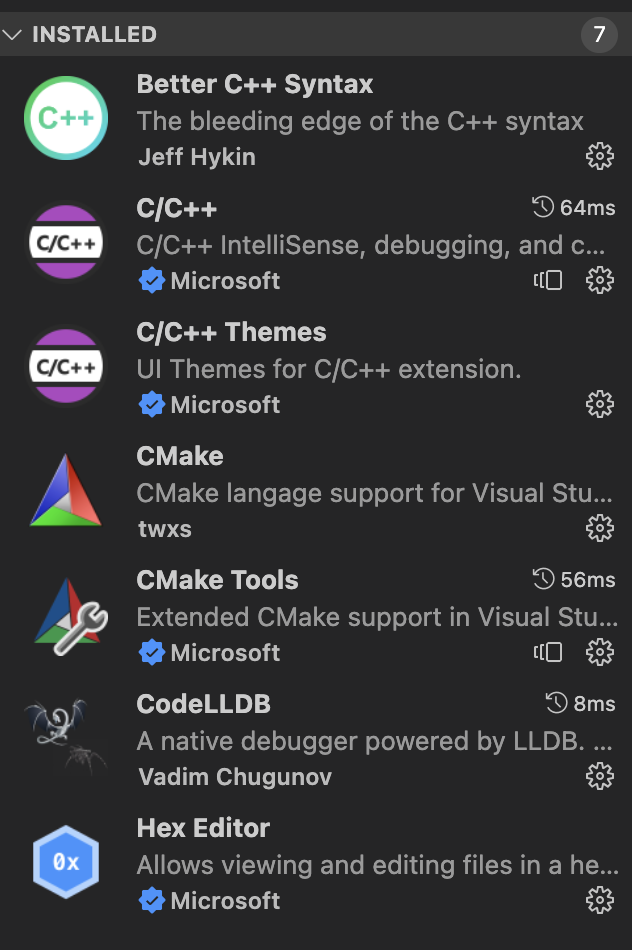
- You will need to quit and reopen Visual Studio Code after installing the extensions.
Working in Visual Studio Code
-
After relaunching Visual Studio Code, you’ll want to open the root folder for your
usccrepo. To do this, go to File>Open Folder… and browse to yourusccfolder on your computer to open it. -
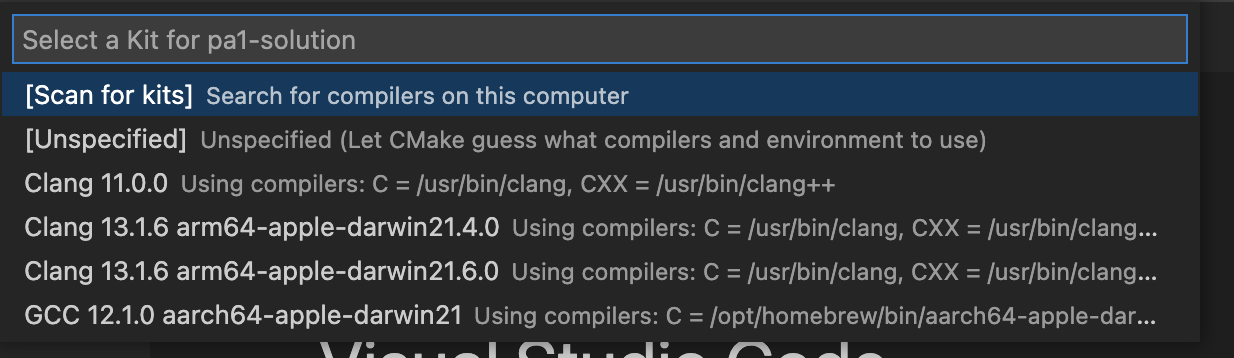
Visual Studio Code should automatically detect that this is a CMake project, and may show you a dropdown like this:
-
Select the most recent Clang option you have (Clang 13.1.6 in this example).
-
Next, click the Build button on the bottom toolbar. It should successfully finish.
-
Since we need to run with command-line arguments you CANNOT launch by using the play or bug button in the button toolbar. Instead, you need to select the “Run and Debug” option and click the green “Debug” button at the top:
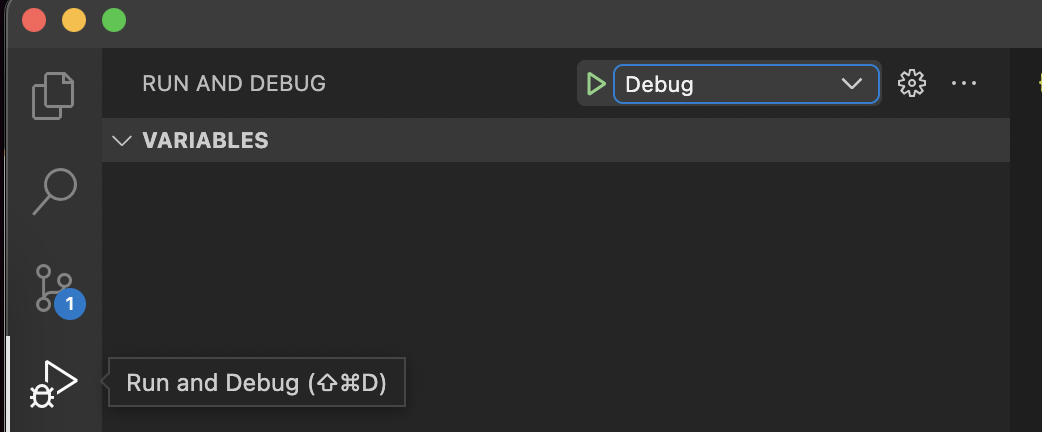
This will launch with the command line arguments in the
launch.jsonfile, which initially are-a test002.usc. This tells uscc to to parse and generate the AST for thetest002.usctest case. -
If you’ve previously debugged in Visual Studio Code, you may hit a breakpoint with a call stack like this:
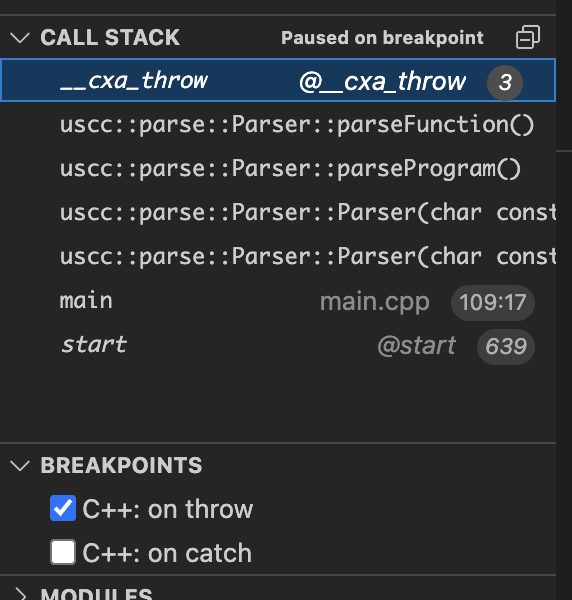 If you get this breakpoint, you should uncheck the “C++: on throw” option under the “BREAKPOINTS” dropdown and then continue past it.
 -
You should see the following output in Visual Studio Code’s terminal:
test002.usc:16:1: error: Function implementation missing
{
^
1 Error(s)
Changing the Command Line Arguments
To change the command line arguments you launch the executable with, you need to edit the launch.json file’s args array:
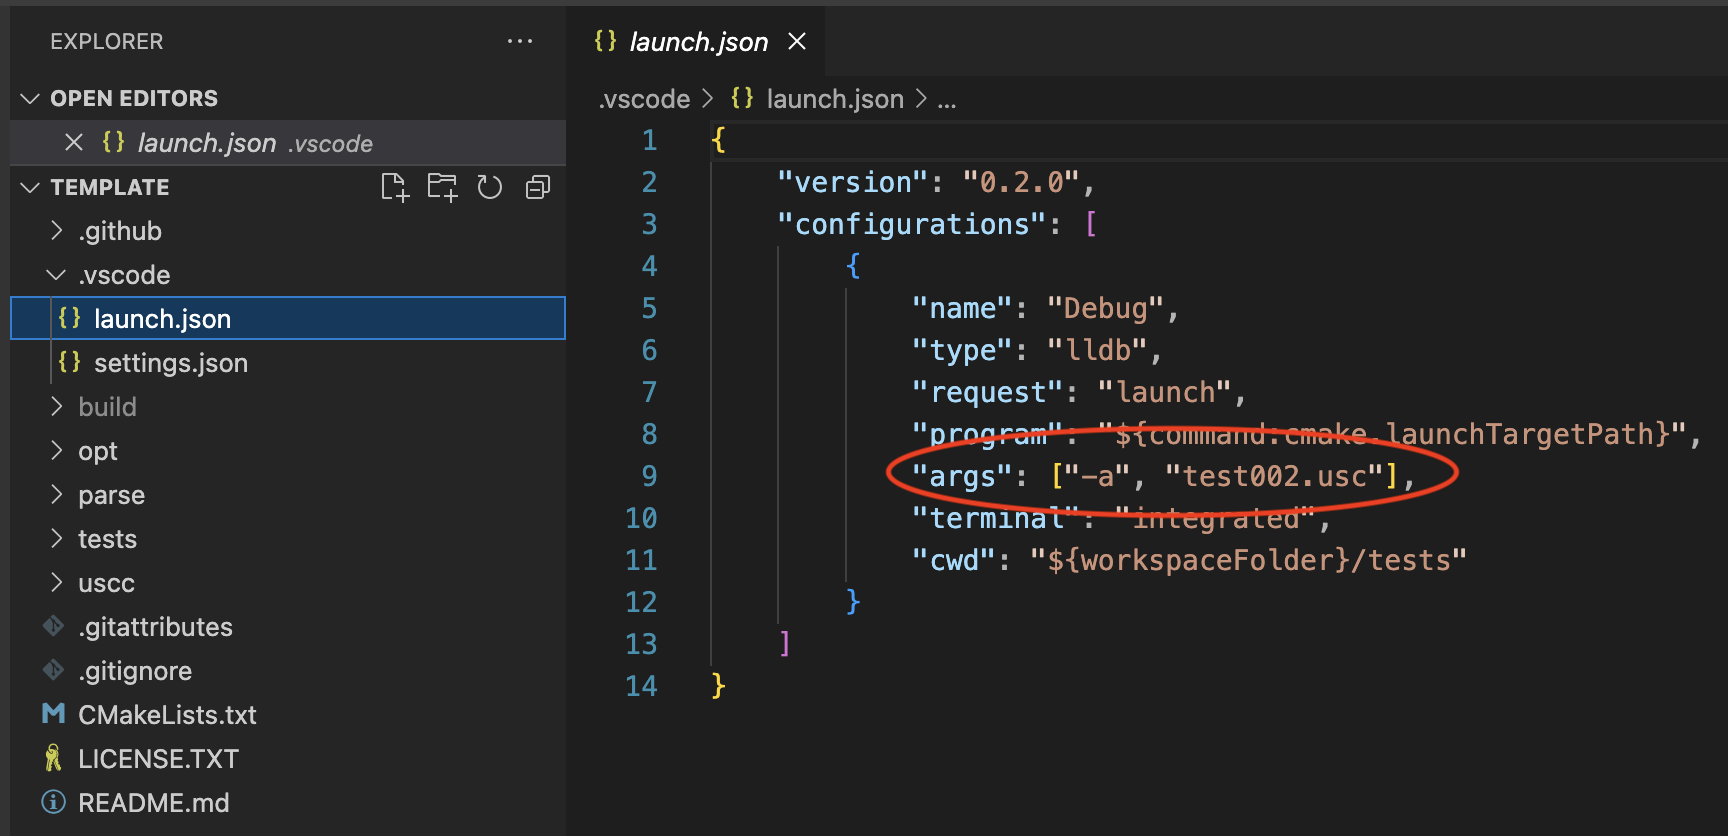
This is the equivalent of launching the uscc executable from the command line with -a test002.usc.
Running the Unit Tests
Although you should do all your development and debugging through Visual Studio Code, to run the entire test suite you will need to run the Python scripts from the command line (you can use the terminal from inside Visual Studio Code to simplify things).
-
Make sure you have built the up-to-date executable in Visual Studio Code.
- Navigate to the tests directory inside your uscc repo, so:
cd ~/itp439/uscc/tests - The test cases for PA1 are in
testParse.py. Run this with:python3 testParse.py - It will tell you that 22 test cases fail (since you haven’t implemented anything for PA1 yet!).
Running the Unit Tests on GitHub
For grading, we will not be downloading your code from GitHub and running it locally. Instead, I’ve setup GitHub Actions so you can manually run the unit tests. It will NOT automatically run on a push. It is your responsibility to manually run it when you think you are ready. When it’s time to submit the assignment, you will submit a link to the specific GitHub Action run you want us to grade, and that’s what we will grade.
To run the Unit Tests on GitHub, do the following:
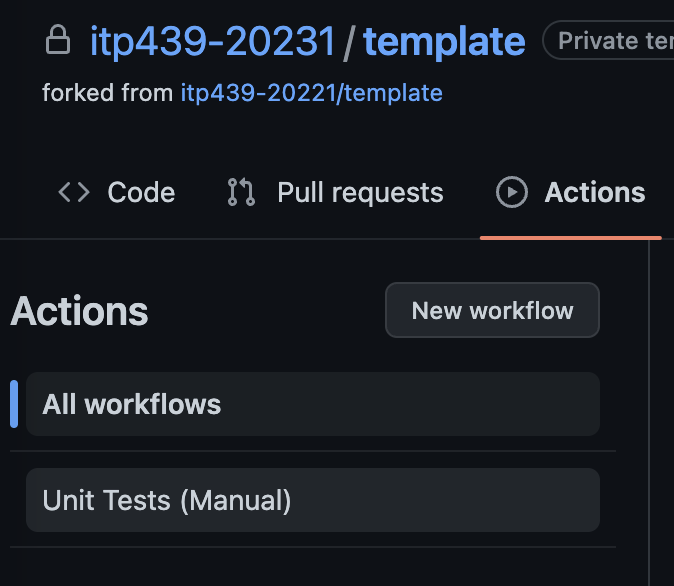
- Go to your repo.
- Click on the “Actions” tab and then click on the “Unit Tests (Manual)” option on the left side of the page:
- From the Unit Tests (Manual) action, on the right hand side of the screen there is a “Run workflow” button, click on that to reveal this dropdown:
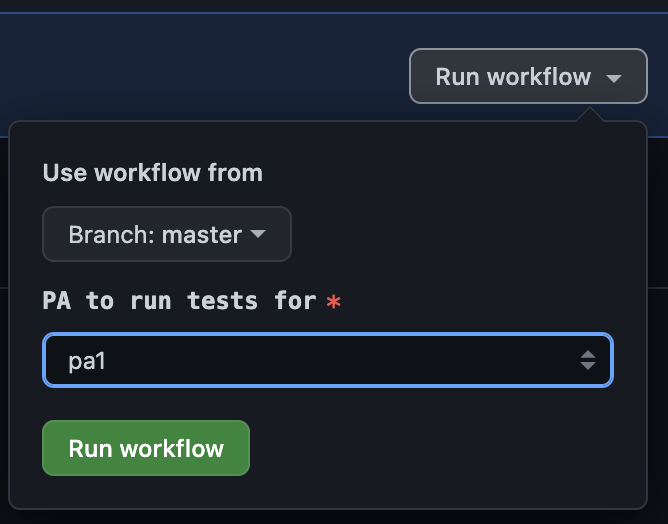
- From this you can select both the branch or tag you want to run the workflow on (keep it at the default for now), as well as a dropdown that lets you select which PA you want to run the tests for. For now, keep it on pa1 and click “Run workflow.”
- You will get a notification that the workflow has started.
- After a couple of seconds, when you refresh the page you’ll see the in-progress workflow. You can click on it to watch it as it goes, if you want to.
- When the workflow job finishes, click on it to go to the summary page. If you scroll down a little bit, you will see a markdown-formatted summary that says how you did and lists out the FAIL/PASS result for each test case. For each test case that fails, there will be a dropdown that lets you view the failure info for why that test failed:
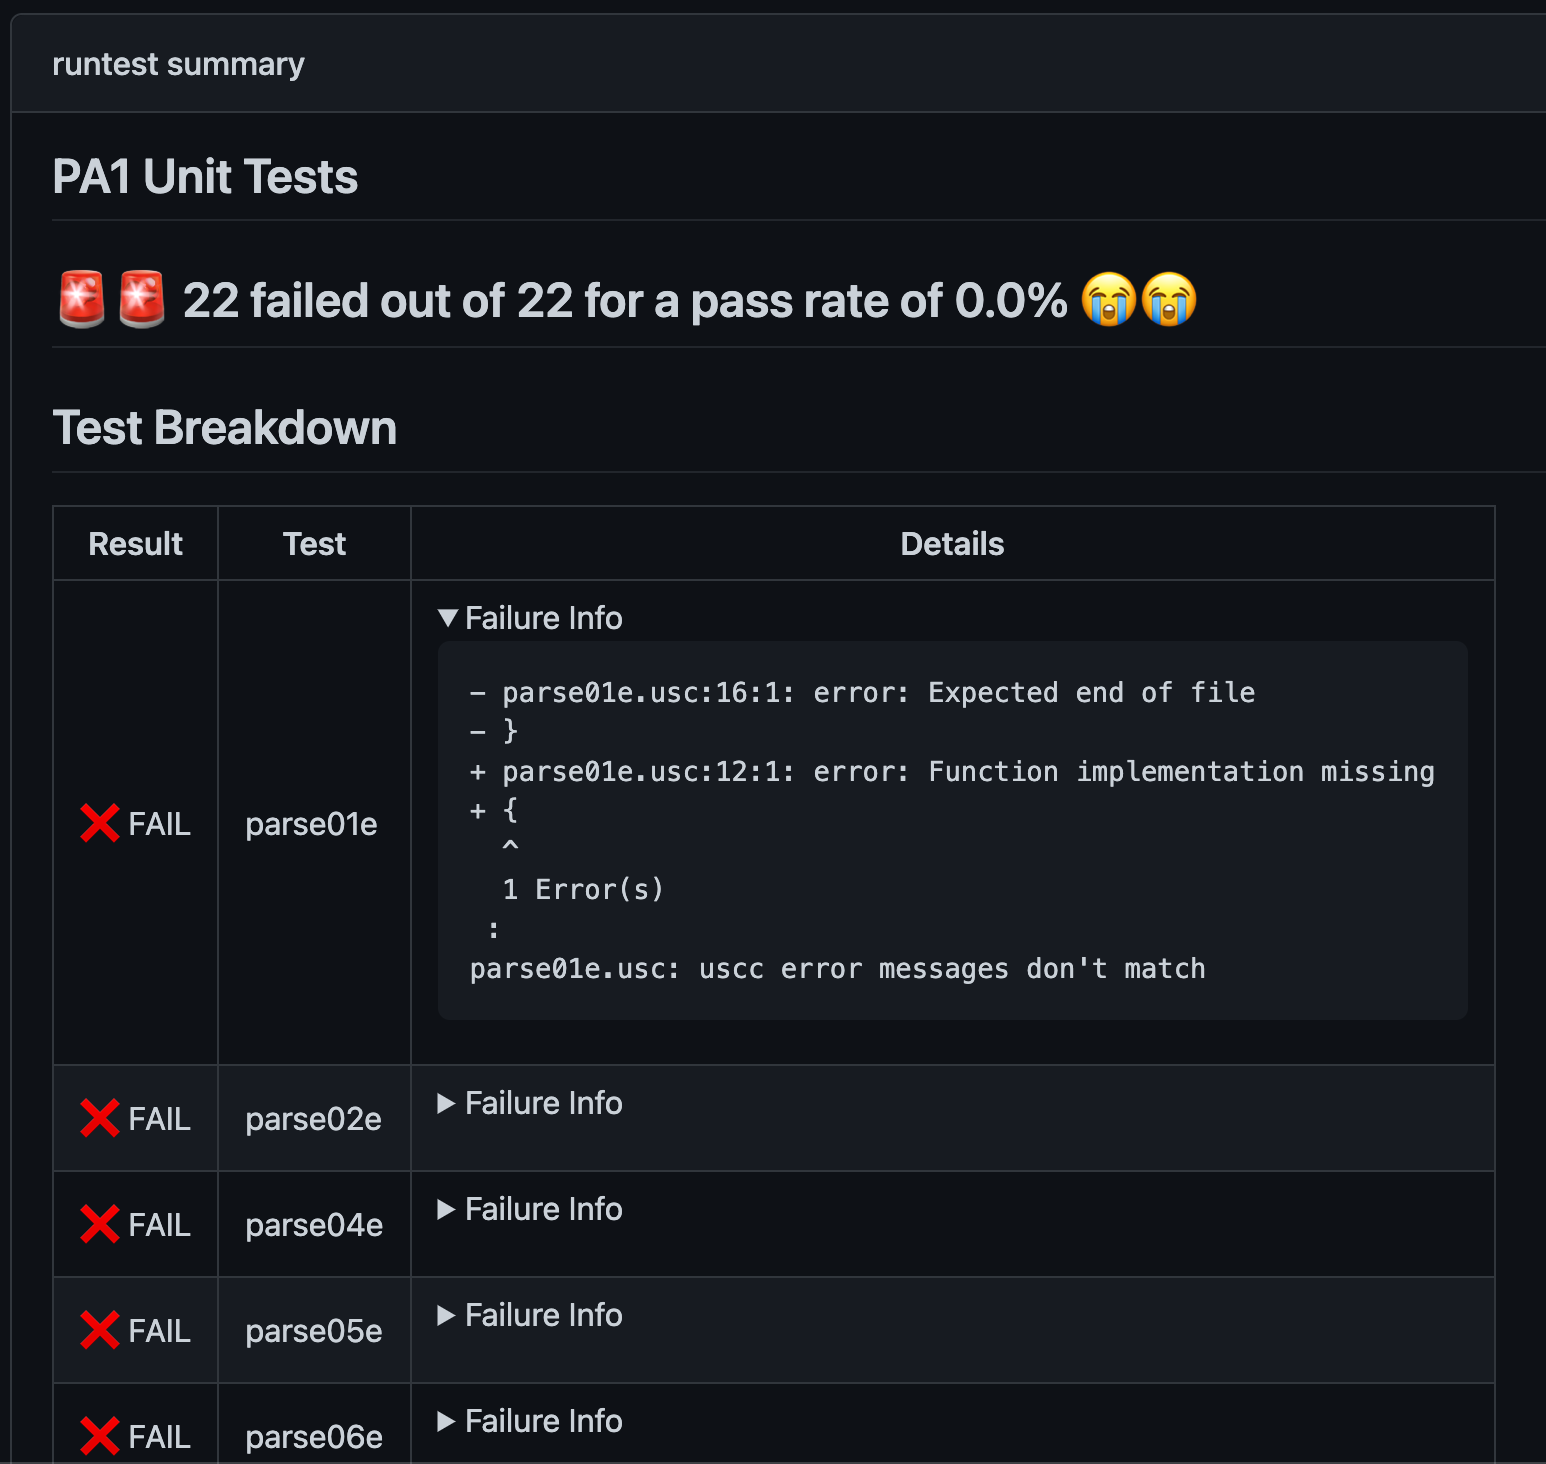 In this case, everything will fail (because nothing’s been implemented yet).
It is your responsibility to make sure that your code compiles and passes the unit tests on GitHub Actions. Code that doesn’t compile will get a 0.